Homemade Halloween Candy: Chocolate Peanut Butter Cups
On Halloween you’re more likely to find me melting chocolate until it’s nice and glossy than watching a scary movie. Tending to a dark pool of chocolate, and tasting along the way, is the perfect indulgence for a cozy stay-in Halloween. Since making homemade candy requires a few steps, it’s also a great project if you have some helpers of any age on hand. From stirring the chocolate to spooning the filling and ultimately topping your homemade peanut butter cups, there are plenty of ways to get everyone involved.
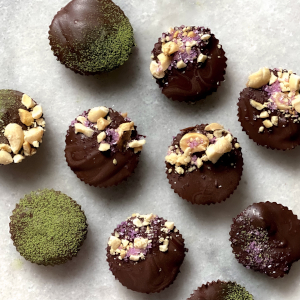
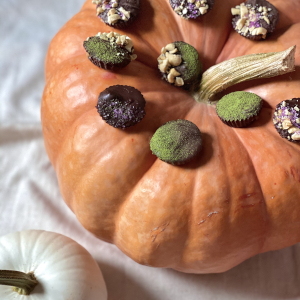
For the dark chocolate peanut butter cups pictured here, I used colorful toppings from my pantry including matcha powder, naturally colored sanding sugar, and chopped nuts. When making homemade candy, you can start with a higher quality chocolate than often found in bagged candies and top with more natural ingredients. Against the rich chocolate, any color looks gorgeous so think about the flavor and texture of toppings too. Swap out the peanut butter for sunflower or cashew butter if you have that on hand. Chocolate is the only essential!
Ingredients
8 ounces dark chocolate (not chocolate chips)
⅓ cup natural peanut butter (or substitute such as sunflower or cashew)
Optional: maple syrup for added sweetness
Toppings such as chopped nuts
Mini muffin liners
This recipe yields about 20 chocolate peanut butter cups. For the best appearance and a good snap, I recommend tempering the chocolate first, which involves heating and cooling in a specific way to align the chocolate’s crystals. I also recommend using a good quality bar chocolate rather than chocolate chips. Lots of factors contribute to how chocolate tempers, so keep in mind that even if things don’t proceed perfectly, your chocolates will still be tasty, and this gives you the perfect excuse to make more.
How to Temper Chocolate
There are multiple ways to temper chocolate, but I prefer the double boiler method as it reliably gives the chocolate a nice snap at room temperature, and the finished chocolates can also be stored at room temperature as opposed to the refrigerator. An instant-read thermometer works better than a candy thermometer. At the bottom of the section I have a tip if you prefer to use the microwave instead.
Chop the chocolate into small pieces and add ⅔ to a glass bowl. Set up a double boiler by filling a small pan halfway with water and bringing it to a simmer. Sit the glass bowl over the pan and allow the chocolate to melt, stirring occasionally, until it reaches 115 degrees. During the tempering process avoid getting moisture in the chocolate.
Remove the glass bowl and add the remaining ⅓ of your chopped chocolate. Use a spoon or spatula to combine the two, stirring until all the chocolate has melted and the temperature drops to about 82 degrees. This is the longest part of the process and requires continual stirring.
Return the bowl to the top of the simmering pot and heat just until it reaches 90 degrees. Remove from heat and stir again. The chocolate should be thick and glossy with no streaks running through it.
Microwave Tip: If you prefer to use the microwave instead of a double boiler, add ⅔ of the chopped chocolate to a bowl. Start heating for 30 second bursts at half power, stirring and monitoring the temperature in between bursts, until the chocolate reaches 115 degrees. Decrease the length of time and amount of power as the temperature starts to rise so that you reach just the right temperature. Once heated, add the remaining ⅓ chocolate incrementally, stirring and monitoring until the chocolate reaches 82 degrees. Then reheat in very short bursts at medium power until the temperature rises to just 90 degrees.
How to Make the Chocolate Peanut Butter Cups
Place 20 liners in a mini muffin baking tray. Spoon 1 teaspoon of the tempered chocolate into each of the liners. Let cool at room temperature for 3 minutes then chill in the freezer for 2 minutes. This gives a firmer surface so later you can spread the peanut butter a bit without pushing it to the bottom of the candy.
During this time, continue to stir the chocolate and make sure it stays at a working temperature of about 89 degrees by heating over a pan of warm water or in the microwave for 5 second bursts at medium power.
In the meantime make sure the natural peanut butter is well-stirred and decide if you’d like some added sweetness. If so, add two teaspoons of maple syrup and continue stirring and adjusting taste to your liking. Salt can be added as well if starting with unsalted peanut butter.
Once the bottoms of the cups have chilled, top each with about ¾ teaspoon of the peanut butter and another 1 teaspoon of chocolate.
Top as desired and let sit in a cool dry room to set. The time it takes to set completely will vary, but if you find the cups are not starting to do so within 15 minutes, you can chill them in the refrigerator to set.